> For the complete documentation index, see [llms.txt](https://ecm-pmdm-flutter.gitbook.io/1.-introduccion-a-flutter/llms.txt). Markdown versions of documentation pages are available by appending `.md` to page URLs; this page is available as [Markdown](https://ecm-pmdm-flutter.gitbook.io/1.-introduccion-a-flutter/2.-instalacion-del-flutter-sdk/instalacion-manual/ejemplo-flutter-in-ubuntu-step-by-step..md).
# Ejemplo, Flutter in Ubuntu: Step by Step.
> We will be setting up flutter in **VS Code** since it allows a much smoother performance on almost any system (even if your system is having 4GB of Ram or low), overall time taken for various tasks reduced nearly by 75% when compared to the time taken while using Android Studio.
The process involved in the setting up process are :
#### 1) Downloading VS Code
* VS Code or Visual Studio Code is an amazing all-in-one code editor developed by the team at Microsoft. It is **free** and **open**-**sourced**.
* You can **download** VS Code:
* From [here](https://code.visualstudio.com/). It doesn’t have much download size and is easy to set up.
* You can also use the terminal to install the VS Code on your system, by running the following code : `$ sudo apt install code`
#### **2) Downloading Flutter SDK**
After installing VS Code, we need to **install Flutter SDK** so that it will enable VS Code to build flutter applications.
In order to install the flutter SDK, you have to follow instructions from the [Flutter Website](https://flutter.dev/docs/get-started/install/linux)
Once you’re done installing the VS Code and Flutter SDK, let’s try opening VS Code. If there hadn’t been any installation errors, VS Code will open without any issue.
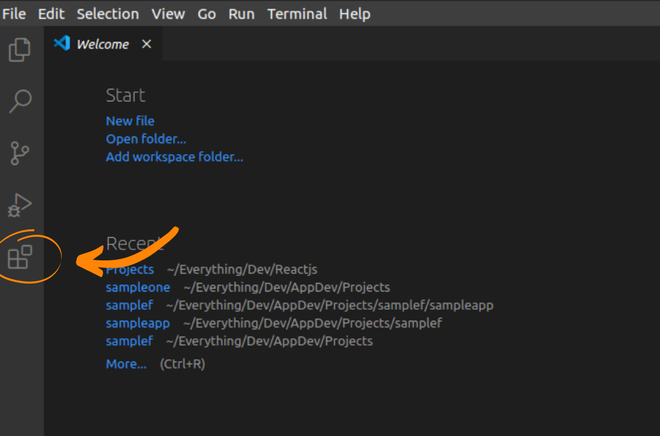
After loading up, we need to **enable** **Git** which is a version control system (VCS) which will be really helpful in the later stages.
For this, select VCS Option from the left side of the VS Code. Please refer to the below image if you’re new to VS Code.

After selecting that, you will find an option to install Git. Once you click on that, you will be taken to the website from which you can download Git for your system. You can also install Git by running the following code on your terminal.
```
$ sudo apt update
$ sudo apt install git
```
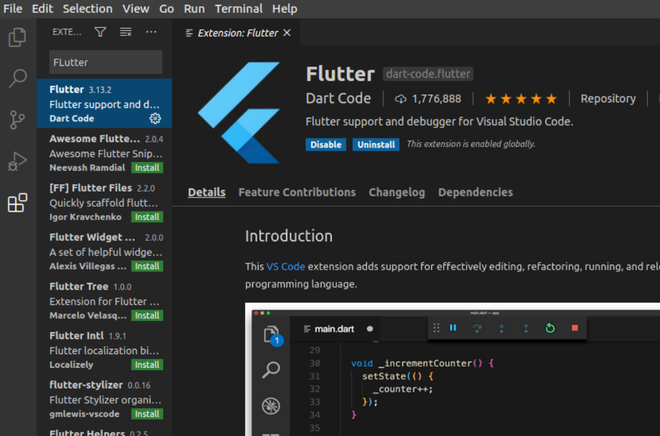
After Installing Git, come back to the VS Code and select the **Extensions** (the icon present at two down the position with that of VCS).
From that, you have to **search** **for** **flutter** **and** **install** that extension. Also, **make sure that Dart is also installed i**n the same method.
Now you’re nearly ready to go. There is one more final installation that you need to perform before you’re all set to go. You will have to install Android Studio for all the essential packages like Manager or if you need to add any virtual devices via AVD Manager.
#### **4) Installing Android Studio**
Though we might be able to download all the packages separately, it may lead on to some errors. To avoid that, let’s install Android Studio so that all the essential packages will get added correctly. You can install Android Studio by running the following command on the terminal.
* First **install** **JDK** :
```
$ sudo apt install openjdk-17-jdk
```
* Now, you can **install** **Android** **Studio from** or:
```
$ sudo snap install android-studio --classic
```
After installing Android Studio, open it from the Applications directory and run it. You will be asked whether to import any settings and select ‘Do not import’ for that. Move ahead with the installation flow and finally, all the installation will be over.
After the installation is over, you will reach the **starting** **page**. From there select the ‘**Configure**’ option present on the right side bottom.
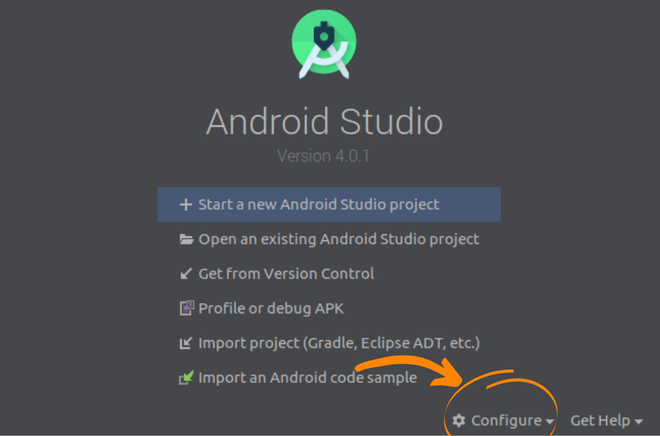
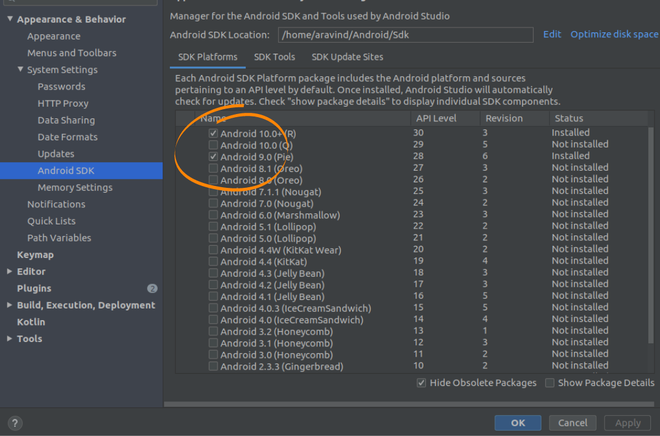
Now, you have to **select** ‘**SDK** **Manager**’ from the list and you will be redirected to a page where you can install the required Android SDKs for various Android OS Versions. **Please make sure that you’re installing the SDK of the same version as that of your phone or the virtual device which you will be setting up later**. Select them and **click** on ‘**Apply**’. After that, you will be prompted to install them and follow the procedure.
Once everything is complete, **close** **everything** including **Android** **Studio** as well as **VS** **Code**. You can **restart VS Code now.** Within VS Code, you can create a new workspace folder (where your project files will be stored). After that, click on View from the top Tool Bar and select the Command Panel.

In that type in Flutter New Project and select it. If everything has been set up correctly, you will be asked to type in your project name. Sometimes, you will be asked to locate the Flutter SDK. In that case, provide the location where you installed the Flutter SDK.
If there were no errors, a project of the name that you provided will load up in a moment. The same can also be achieved by running the following command on the terminal present on VS Code (select Terminal from the toolbar on the top and run the following command.
`flutter create `
where \ can be changed with the name of your preference. Once the project loads completely, all the files can be accessed from the Files section of VS Code present on the left side tool bar (2 positions above that of the VCS).
You may connect your physical device (android) for installing the application or you may install a new Android Virtual Device from the AVD Manager, just like how we installed the SDKs from SDK Manager. The Run option can be found just below VCS and it can be used to run and debug your application.
Now, you’re all set to develop flutter application using VS Code.
Happy Coding!